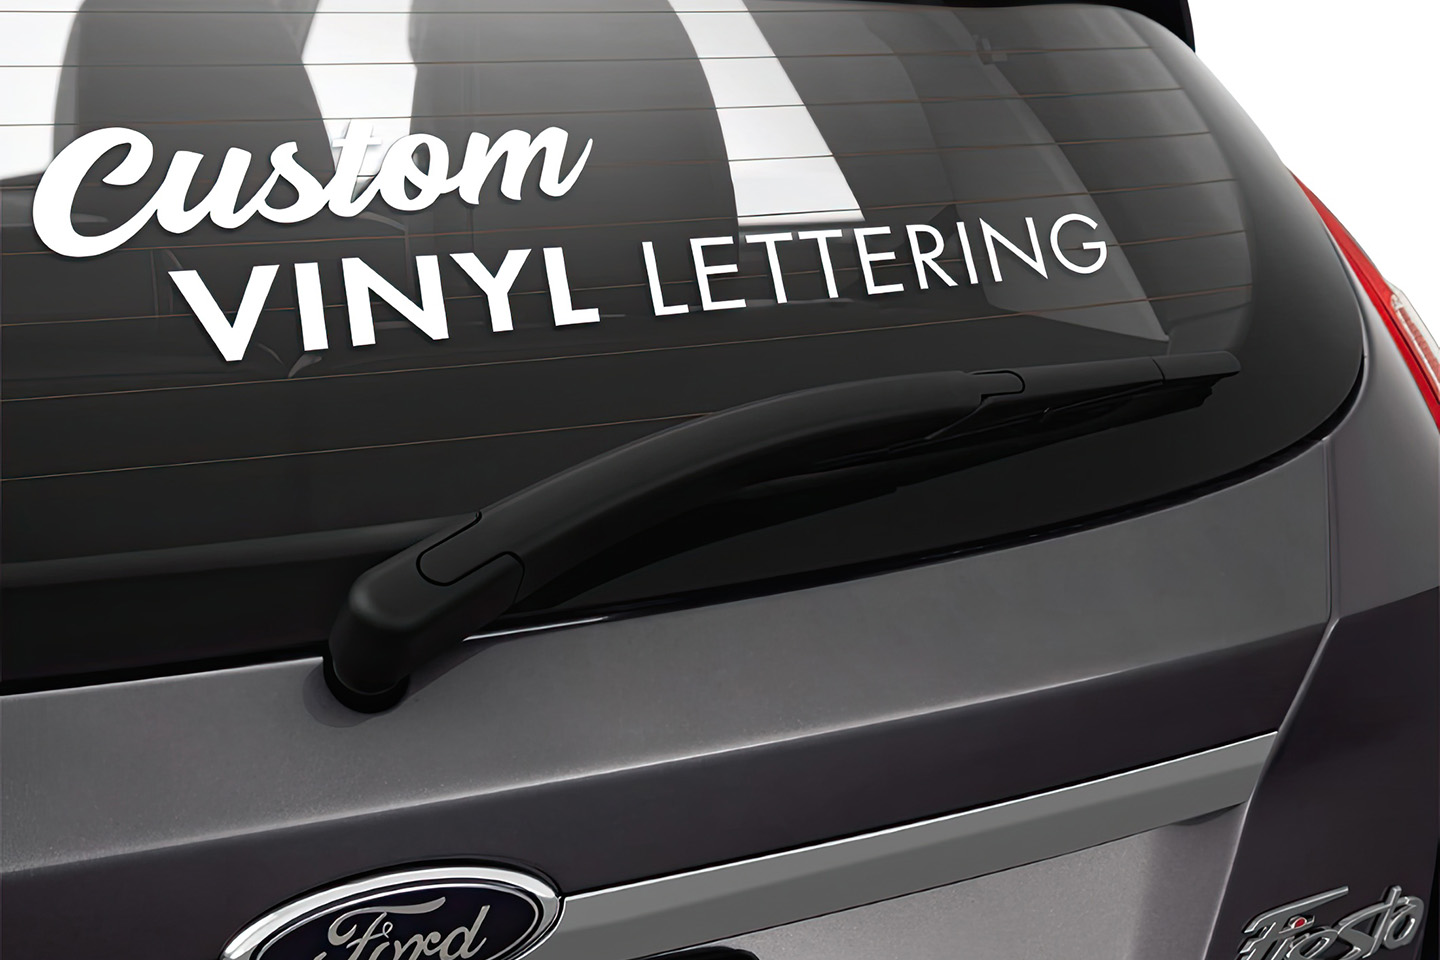
When you order RTA (Ready to Apply) vinyl, we cut your logo or lettering for self-install. In addition to many tutorials on youtube, here are some tips from our experts:

Recommended tools:
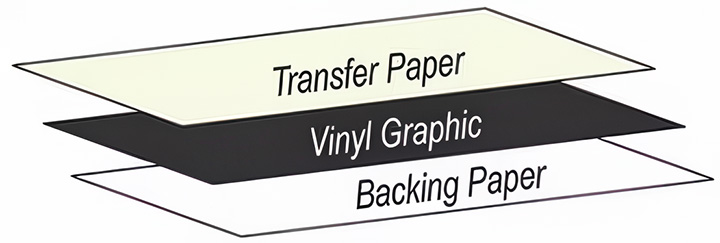
When you receive your RTA vinyl, there are 3 layers: the top transfer paper, the vinyl graphic, and the backing paper. Unroll your kit, and press out any large bubbles or wrinkles, making sure the transfer tape is stuck well to all parts of the vinyl. Store it flat at room temperature till you're ready for install.
Modern air-release vinyls require dry install. Some oldschool vinyls allow the wet spray method, so check with us which type your vinyl needs. We use RapidTac application fluid, or you can homebrew something similar with a spray bottle of water, one drop of Dawn dish soap, and a splash of rubbing alcohol. Don't use window cleaner to wet apply vinyl; it reduces the adhesive.
Some vinyls can withstand service temperatures of -40°F to 200°F after they've been installed. But until then, uninstalled vinyl likes to stay within 50° to 90°F, or you'll face difficulty during install. Your install surface should ideally be within the 50° to 90°F range too, so weather or time of day will impact your install schedule. Too hot and the vinyl will get gummy, with a high risk to stretch, warp, or wrinkle. Too cold and the material will get brittle, with a high risk of breaking or not sticking. You can warm up a surface with a heat gun, but A/C or morning shade are your best hope for hot surfaces.
Your surface should be clean and smooth, free of dust or residues like wax, grease, or oil. On glass and metal, we use 70% isopropyl alcohol and a lint-free cloth. We don't use ammonia-based window cleaner. Soap, cleansers, or degreasers might be needed, just be sure to rinse completely, then alcohol.
After your surface is clean and completely dry, use masking or painters tape on the top corners to tack the image in place. Use a ruler or measuring tape to verify it's straight, center, level, etc. Adjust the tape corners till you're happy with placement.
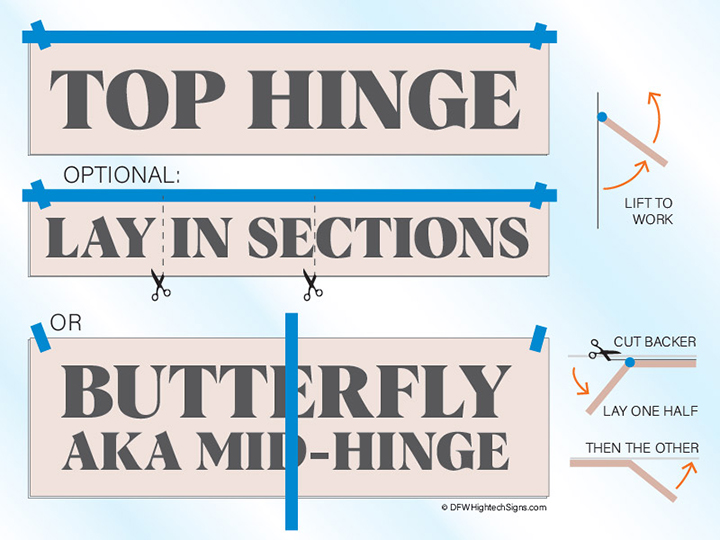
Depending on the size and shape of your graphics, installers use different tape methods to secure the graphic in place. Use tape to make a "hinge", so you can lift up the graphics and do your work, while the tape-hinge holds everything in place. If you watch tutorials online, the top 3 hinge methods are:
Once your graphic is in position and taped with a hinge, you're ready to install. Lift up your sheet, and remove the backing paper, so you have just the top transfer paper holding your vinyl graphic. Pull the backer away slowly, to watch and make sure all the vinyl parts stick with the transfer paper, not the backer.
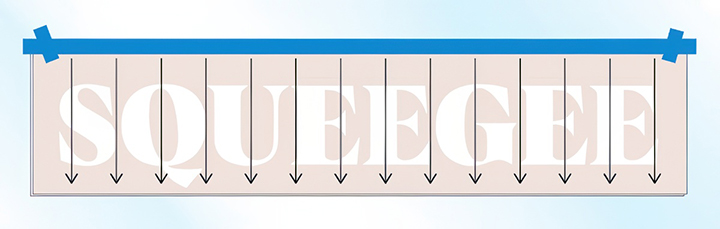
After the backer is removed, the graphic will be flimsy and sticky, so be careful it doesn't fold onto itself. Slowly lower the sheet back toward the surface, without landing down yet. Use your squeegee (or old credit card) to press the vinyl down. Start at the tape hinge, working outward, overlapping your passes top to bottom. Work evenly, edge to edge. It's better to use one firm press than many soft passes. Once it's down, go over it a final pass with firm strokes, maybe even a heat gun, to ensure it's fully adhered with no bubble areas.
Once the vinyl is pressed down completely, you can carefully peel away the top transfer paper. If any part of the vinyl wants to peel up with it, push it back down, re-apply pressure, and try again. It's often better to peel transfer tape back at a sharp angle onto itself, versus pulling it up at a 90 degree angle. For really stuck-on transfer tape, try wetting it with a cloth, and it will release easier when damp.
Addison • Allen • Alvord • Anna • Argyle • Arlington • Aubrey • Aurora • Azle • Bailey • Balch Springs • Bartonville • Bedford • Bells • Benbrook • Blue Mound • Blue Ridge • Bonham • Bowie • Boyd • Briaroaks • Bridgeport • Burleson • Caddo Mills • Callisburg • Campbell • Carrollton • Cedar Hill • Celeste • Celina • Chico • Cleburne • Cockrell Hill • Colleyville • Collinsville • Copper Canyon • Coppell • Corinth • Corral City • Cross Roads • Cross Timber • Crowley • Dallas • Dalworthington Gardens • Decatur • Denison • Denton • DeSoto • Dish • Dodd City • Dorchester • Double Oak • Duncanville • Eagle Mountain • Ector • Edgecliff Village • Elizabethtown • Ennis • Euless • Everman • Fairview • Farmers Branch • Farmersville • Fate • Ferris • Flower Mound • Forest Hill • Forney • Fort Worth • Frisco • Gainesville • Garland • Glenn Heights • Grand Prairie • Grapevine • Greenville • Gunter • Hackberry • Haltom City • Haslet • Heath • Hebron • Hickory Creek • Highland Park • Highland Village • Howe • Hurst • Hutchins • Irving • Josephine • Joshua • Justin • Kaufman • Keller • Kennedale • Knollwood • Krugerville • Lancaster • Lake Bridgeport • Lake Dallas • Lake Worth • Lakewood Village • Lavon • Leonard • Lewisville • Lincoln Park • Lindsay • Little Elm • Lowry Crossing • Lucas • Mansfield • McKinney • McLendon-Chisholm • Melissa • Mesquite • Midlothian • Mobile City • Muenster • Murphy • Mustang • Nevada • New Fairview • New Hope • Newark • Neylandville • Nocona • Northlake • North Richland Hills • Oak Leaf • Oak Point • Ovilla • Pantego • Paradise • Parker • Pecan Hill • Pelican Bay • Pilot Point • Plano • Ponder • Pottsboro • Princeton • Prosper • Providence Village • Red Oak • Rhome • Richardson • Richland • Richland Hills • River Oaks • Roanoke • Rockwall • Rowlett • Royse City • Runaway Bay • Sachse • Sadler • Saginaw • Sanctuary • Sanger • Sansom Park • Savoy • Shady Shores • Sherman • Southlake • Southmayd • Springtown • St. Jo • St. Paul • Sunnyvale • The Colony • Tioga • Tom Bean • Trenton • Trophy Club • Union Valley • University Park • Valley View • Van Alstyne • Waxahachie • Watauga • Weatherford • Westlake • Westover Hills • Westworth Village • Whitesboro • White Settlement • Whitewright • Wilmer • Wolfe City • Wylie